
Leviton motion sensor switches offer energy-efficient, automated lighting control. This manual guides installation, configuration, and troubleshooting, ensuring safe and optimal use of these innovative devices.
Overview of Leviton Motion Sensor Switches
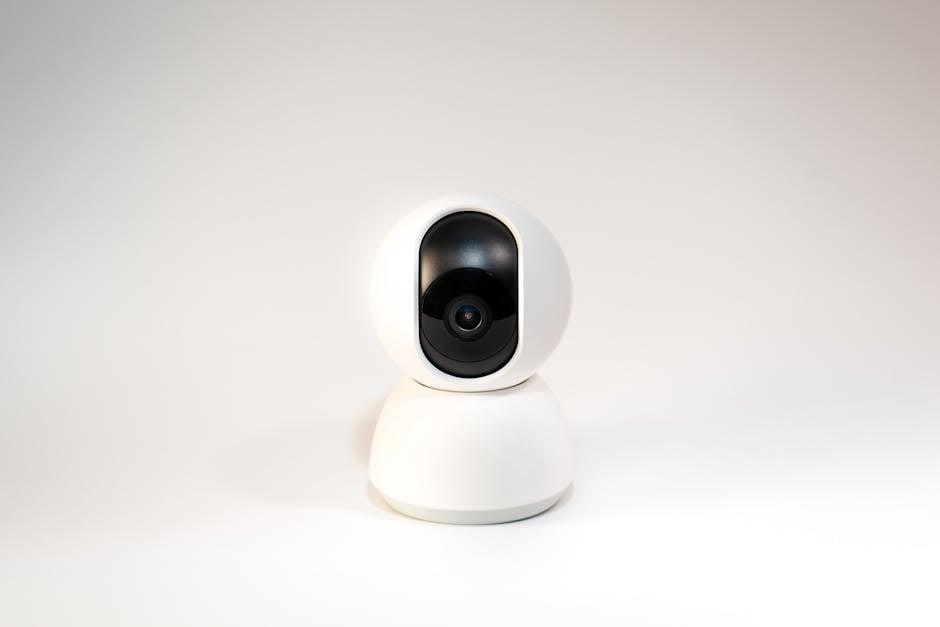
Leviton motion sensor switches provide automatic lighting control, enhancing energy efficiency and convenience. Designed for commercial and residential use, they detect motion via PIR technology, activating lights when needed. Compatible with various lighting types, including LED, CFL, and incandescent, these switches offer customizable settings like sensitivity and timer controls. Ideal for spaces like classrooms, offices, and hallways, they ensure seamless operation while reducing energy waste. Their sleek design integrates with standard wallboxes, making them a versatile solution for modern lighting needs.
Importance of Reading the Manual
Reading the Leviton motion sensor switch manual is essential for safe and proper installation. It provides critical warnings, compatibility details, and setup instructions to ensure optimal performance. The manual outlines safety precautions, such as turning off power at the circuit, to prevent accidents. Understanding the sensor’s features, like sensitivity adjustments and timer settings, is crucial for customization. Proper installation and configuration ensure energy efficiency, reliability, and compliance with electrical standards. Referencing the manual helps avoid common mistakes and guarantees your switch operates as intended.
Key Features of Leviton Motion Sensor Switches
Leviton motion sensor switches offer advanced automation for lighting control. They feature passive infrared (PIR) technology for reliable motion detection and customizable settings like sensitivity, timer, and ambient light adjustments. These switches are compatible with various lighting types, including LED, CFL, and incandescent. Energy-saving modes and multi-sensor synchronization enhance their functionality. Designed for safety and convenience, they integrate seamlessly with smart home systems, providing efficient and user-friendly operation while ensuring compliance with electrical standards.
Understanding Leviton Motion Sensor Switch Components
Leviton motion sensor switches include a sensor lens, switch mechanism, and wiring terminals. These components work together to detect motion and control lighting automatically for energy efficiency.
Main Components of the Switch
The Leviton motion sensor switch consists of key components, including a PIR sensor lens for detecting motion, a control dial for adjusting sensitivity, and wiring terminals for connections. It also features an LED indicator for status feedback and a switch mechanism that toggles lighting automatically. These components ensure reliable performance and energy efficiency in various settings, from residential to commercial applications, making it a versatile solution for automated lighting control systems.
Sensor Types (PIR, Ultrasonic, etc.)
Leviton motion sensor switches primarily utilize Passive Infrared (PIR) sensors, which detect heat and motion within a specified range. PIR sensors are highly effective for automatic lighting control, offering wide coverage areas and reliability. While ultrasonic sensors use sound waves, Leviton switches focus on PIR technology for its accuracy and energy efficiency. These sensors are ideal for detecting human movement, making them suitable for applications in offices, classrooms, and commercial spaces, ensuring seamless and convenient lighting automation.
Switch Compatibility (Single-Pole, 3-Way, etc;)
Leviton motion sensor switches are compatible with both single-pole and 3-way wiring configurations, offering flexibility for various lighting setups. They can be installed in place of standard wall switches, supporting incandescent, LED, CFL, and fluorescent loads. Models like the DOS05 and ODS10-ID cater to single-pole applications, while others support 3-way setups for multi-location control. This versatility ensures seamless integration into existing electrical systems, providing efficient and convenient lighting automation for diverse environments.

Installation Requirements and Preparation
Ensure power is turned off at the circuit breaker. Gather tools like screwdrivers and wire strippers. Familiarize yourself with wiring diagrams and compatibility requirements for a smooth setup.
Tools and Materials Needed
To install a Leviton motion sensor switch, you’ll need a screwdriver, wire strippers, and needle-nose pliers. Ensure you have a voltage tester for safety. Materials include wire connectors, wall anchors, and possibly additional wiring. Refer to your specific Leviton model (e.g., ODS10-ID or DOS02) for any unique requirements. Always follow the manual’s guidelines for compatible tools and materials to ensure a secure and proper installation.
Wiring Requirements and Diagrams
Leviton motion sensor switches require proper wiring connections. Ensure the line (hot) and load wires are correctly identified. Refer to the provided wiring diagrams for single-pole or 3-way setups. The neutral wire is typically required for operation. Verify the circuit’s voltage and amperage match the switch’s specifications. Use the traveler wire for multi-switch applications. Always turn off power at the circuit breaker before starting any wiring to avoid electrical hazards and ensure a safe installation process.
Location and Placement Guidelines
Leviton motion sensor switches should be installed in locations with optimal motion detection coverage. Mount the sensor at a height of 4 feet to ensure accurate detection. Avoid placing sensors near windows, doors, or areas with direct sunlight to prevent false triggers. For best performance, install in rooms with typical occupancy patterns, such as classrooms or offices. Ensure the sensor’s field of view is unobstructed and covers the desired area. Refer to the coverage diagram for proper placement and alignment to maximize efficiency and reliability.
Understanding Load and Line Wires
When installing a Leviton motion sensor switch, it’s essential to distinguish between load and line wires. The line wire carries power from the electrical source to the switch, while the load wire connects to the lighting fixture. Ensure the line wire is connected to the “L” terminal and the load wire to the “LOAD” terminal. Proper identification and connection are critical for safe and correct functionality. Always turn off power at the circuit breaker before handling wires to avoid electrical shock or damage. Refer to the wiring diagram in the manual for precise connections.

Step-by-Step Installation Guide
- Turn off power at the circuit breaker.
- Remove the old switch carefully.
- Connect wires to the motion sensor switch.
- Mount the switch in the wall box.
- Restore power and test functionality.
Turning Off Power and Safety Precautions
Before installation, turn off power to the circuit at the breaker box. Verify power is off using a voltage tester. Avoid contact with live wires to prevent shock or injury. Ensure the switch cools down if recently active. Wear insulated tools and follow all safety guidelines to avoid electrical hazards. This step is critical for a safe and successful installation process.
Removing the Old Switch
Start by disconnecting the power to the circuit. Test for voltage to ensure safety. Use a screwdriver to remove the mounting screws holding the old switch in place. Gently pull the switch out from the wall box. Identify and label each wire for proper reconnection. Carefully disconnect the wires from the old switch. Remove any additional components or faceplates. Set the old switch aside, ensuring all wires remain securely in the wall box for the new installation.
Connecting Wires to the Motion Sensor Switch
Identify the line (hot), load, and ground wires. Attach the ground wire to the motion sensor switch’s grounding terminal. Connect the line wire to the “Line” terminal and the load wire to the “Load” terminal. For 3-way setups, connect any traveler wires to the designated terminals. Ensure all connections are secure and double-check the wiring diagram provided in the manual. If your switch has additional features like bypass mode, connect the corresponding wires as specified. Tuck the wires neatly into the wall box and prepare for mounting the new switch.
Mounting the Switch in the Wall Box
Align the motion sensor switch with the wall box, ensuring screw holes match. Gently push the switch into the box and secure it using the provided screws. Tighten firmly but avoid over-tightening, which could damage the device. Ensure the switch is level and fits snugly. If wires are loose, tuck them neatly into the box to prevent interference. This step completes the physical installation, preparing the switch for power restoration and testing. Proper mounting ensures reliable performance and longevity of the device.
Restoring Power and Testing the Switch
After mounting the switch, restore power by flipping the circuit breaker or replacing the fuse. Wait a few moments to ensure the system stabilizes. Test the motion sensor by moving within its detection range to verify lights turn on and off automatically. Check for proper coverage and adjust settings if needed. If issues arise, refer to the troubleshooting section. Ensure all safety guidelines are followed to avoid electrical hazards and confirm compatibility with your lighting setup.
Configuring Motion Sensor Settings
This section explains how to customize your motion sensor switch settings, including sensitivity, timers, and ambient light detection, to enhance functionality and user experience.
Adjusting Sensitivity and Range
Adjusting the sensitivity and range ensures optimal performance. Turn the sensitivity dial to reduce false triggers. Use the range adjustment to set detection area. Higher sensitivity detects minor movements but may cause false activations. Lower sensitivity reduces false triggers but may miss subtle motions. Ensure the sensor’s field of view aligns with the desired coverage area, avoiding obstructions. Proper adjustment enhances reliability and energy efficiency, ensuring lights respond appropriately to motion. Refer to the manual for specific dial locations and settings.
Setting Timer and Delay Options
Adjust the timer to set how long lights stay on after motion is detected. Use the delay setting to determine the time before the sensor stops detecting motion. For multiple sensors, set the timer on one device; others will sync via the traveler wire. Ensure settings match your lighting type (incandescent, LED, etc.) for optimal energy efficiency. Test adjustments to find the right balance for comfort and energy savings, and refer to the manual for specific instructions and default values.
Customizing Ambient Light Settings
Adjust the ambient light settings to control when the sensor activates based on natural light levels. Use the sensitivity dial or button controls to set the desired light threshold. For spaces with varying light conditions, fine-tune the sensor to prevent unnecessary activations. Ensure the settings align with your lighting preferences and energy-saving goals. Test the adjustments to confirm proper functionality in different lighting scenarios for optimal performance and convenience.
Enabling/Disabling Bypass Mode
Bypass mode allows manual control of lighting, overriding motion detection. To enable/disable, press and hold the button until the LED blinks. This feature is useful for continuous lighting needs. Use it to customize operation based on specific scenarios. Ensure proper functionality by testing after adjustments. Refer to the manual for detailed instructions to avoid errors during setup.

Troubleshooting Common Issues
Identify and resolve issues like flickering lights, sensor inactivity, or LED errors. Refer to the manual for diagnostic steps and solutions to ensure optimal performance.
Flickering Lights or No Response
Flickering lights or no response may indicate wiring issues or sensor malfunctions. Check connections for loose wires and ensure power is correctly supplied. Verify that the sensor’s field of view is unobstructed and free from interference. Adjust sensitivity settings or reset the switch if necessary. If issues persist, consult the manual for advanced troubleshooting steps or contact Leviton support for assistance. Always ensure proper installation and configuration to prevent such problems.
Sensor Not Detecting Motion
If the sensor fails to detect motion, check wiring connections and ensure proper installation. Verify that the sensor’s field of view is unobstructed and adjust its placement if necessary. Ensure sensitivity settings are appropriate for the space. Consult the manual for calibration instructions. Power cycle the device or reset settings to default. If issues persist, consider replacing the sensor or contacting Leviton support for further assistance. Proper alignment and configuration are key to optimal performance.
LED Indicator Blinking or Error Codes
A blinking LED or error code indicates a potential issue with the motion sensor switch. Common error codes like E1 or E2 may signify power issues or sensor malfunctions. Refer to the manual for specific code meanings. Check wiring connections and ensure proper power supply. Reset the device by turning it off and on. If the issue persists, consult Leviton support or replace the sensor. Error codes are designed to help diagnose and resolve problems efficiently.

Advanced Features and Customization
Leviton motion sensors offer multi-sensor synchronization, smart home integration, and programmable timers. Customize settings for energy savings, ambient light, and motion detection to enhance functionality and convenience;
Multi-Sensor Installation and Synchronization
For multi-sensor setups, Leviton motion sensors can be synchronized to ensure seamless coverage. Install sensors in strategic locations and connect them using traveler wires for unified operation.
Program sensitivity and timers on one sensor, which will sync across all devices. Test individual sensors to confirm coverage areas and adjust as needed for optimal performance.
This feature is ideal for large spaces, ensuring consistent lighting control without gaps in detection or operation.
Integrating with Smart Home Systems
Leviton motion sensor switches can seamlessly integrate with smart home systems, enhancing automation and convenience. Compatible with platforms like Zigbee and Z-Wave, these switches work with popular systems such as Samsung SmartThings. Users can control lighting via voice commands through Amazon Alexa or Google Assistant. The Leviton Decora Smart app allows remote monitoring and customization. This integration enables advanced features like scene control and energy monitoring, making it easy to optimize your home’s lighting system for efficiency and comfort.
Programming Multiple Timers and Scenes
Leviton motion sensor switches allow programming multiple timers and scenes for tailored automation. Users can set custom schedules and lighting scenes via the Leviton Decora Smart app. Program timers to activate lights during specific hours or create scenes for different activities, like movie nights or wake-up routines. Multiple timers can be synchronized across devices, ensuring consistent lighting automation. Customizable settings adapt to your lifestyle, enhancing convenience and energy efficiency while maintaining seamless control over your smart lighting system.
Energy-Saving Modes and Settings
Leviton motion sensor switches offer energy-saving modes that automatically turn lights off when no motion is detected. Users can customize settings to optimize energy usage, such as adjusting timers, sensitivity, and ambient light detection. These features help reduce unnecessary power consumption and lower utility bills. By automating lighting control, Leviton switches promote eco-friendly practices and enhance home energy efficiency, ensuring minimal waste while maintaining convenience and performance.

Maintenance and Repair
Regular maintenance ensures optimal performance. Clean the sensor lens for accuracy and inspect wires for damage. Replace worn parts promptly and perform annual checklists for reliability.
Cleaning the Sensor Lens
Cleaning the sensor lens is crucial for maintaining accurate motion detection. Use a soft, dry cloth to wipe away dust or debris. For stubborn smudges, dampen the cloth with mild detergent, but avoid harsh chemicals. Regular cleaning ensures optimal performance and prevents false activations. Always power off the switch before cleaning to avoid damage or electrical shock. This simple maintenance step helps preserve the sensor’s reliability and extends its lifespan, ensuring consistent automation of your lighting system.
Replacing Worn-Out Parts
Regularly inspect the sensor and switch components for wear. Replace any damaged or worn-out parts using genuine Leviton replacement kits to ensure compatibility and safety. Turn off power at the circuit breaker before starting repairs. Use a screwdriver to remove the faceplate and access internal components. Replace faulty sensors, wiring, or mounting hardware carefully to avoid further damage. Ensure all connections are secure and properly grounded. Consult the manual or contact Leviton support for specific part numbers and guidance.
Updating Firmware (if applicable)
For Leviton motion sensor switches with smart features, firmware updates may be required to enhance functionality or fix issues. Check the Leviton website or mobile app for available updates. Ensure the switch is connected to Wi-Fi or a computer via a compatible interface. Follow the step-by-step instructions provided in the update guide to download and install the latest firmware. Avoid interrupting the update process to prevent system corruption. After completion, test the switch to confirm proper operation.
Annual Maintenance Checklists
Performing annual maintenance ensures your Leviton motion sensor switch operates efficiently. Clean the sensor lens with a soft cloth to remove dust or debris. Inspect and tighten all wire connections to prevent electrical issues. Test the switch’s motion detection and lighting response to ensure proper functionality. Update firmware if available, following Leviton’s instructions. Check for any wear or damage to components and replace them as needed. This routine maintenance helps maintain reliability and extends the product’s lifespan.

Safety and Compliance
Ensure compliance with electrical standards and safety protocols. Follow Leviton’s guidelines for fire prevention, shock avoidance, and proper disposal. Adhere to all warnings and cautions provided.
Understanding Warnings and Cautions
Understanding warnings and cautions in the Leviton motion sensor switch manual is crucial for safe installation and operation. Always turn off power at the circuit breaker before starting work to avoid electrical shock or fire hazards. Follow all provided instructions carefully to ensure compliance with safety standards. Failure to adhere to warnings may result in serious injury, death, or property damage. Familiarize yourself with specific precautions, such as avoiding overload and ensuring proper grounding, to guarantee a safe and reliable setup.
Compliance with Electrical Standards
Leviton motion sensor switches are designed to comply with UL (Underwriters Laboratories) and NEC (National Electrical Code) standards, ensuring safe and reliable operation. These devices are rated for specific voltage and load capacities, such as 120VAC, 60Hz, and compatible with various lighting types. Compliance guarantees adherence to industry safety requirements, protecting against hazards like electrical shock or fire. Always verify local electrical codes and regulations before installation to ensure full compliance with regional standards and requirements.
Fire and Shock Prevention Tips
To prevent fire and electrical shock, always turn off power at the circuit breaker before installation or maintenance. Use properly rated tools and materials, avoiding damaged wires or connections. Ensure all connections are secure and meet Leviton’s specifications. Never overload the switch beyond its rated capacity. Keep the sensor lens clean to maintain proper function. Follow all safety guidelines in the manual to avoid hazards and ensure reliable operation of your Leviton motion sensor switch.
Disposal and Recycling Guidelines
Properly dispose of Leviton motion sensor switches by recycling electronic components. Disconnect power and remove batteries before disposal. Check local regulations for e-waste recycling centers. Many communities offer certified facilities for safe disposal of electrical devices. Recycling helps prevent hazardous materials from entering landfills. Ensure all components are handled responsibly to protect the environment. Always follow local guidelines and Leviton’s recommendations for sustainable disposal practices. This helps conserve resources and reduces environmental impact while adhering to safety standards.
Leviton motion sensor switches enhance convenience and energy efficiency. Proper installation, configuration, and maintenance ensure optimal performance. Refer to Leviton’s support resources for further assistance and troubleshooting.
Final Tips for Optimal Performance
To ensure optimal performance of your Leviton motion sensor switch, regularly clean the sensor lens, adjust sensitivity settings based on your space, and check wiring connections. For multi-sensor setups, synchronize settings to avoid interference. Test the switch periodically and update firmware if available. Always refer to the manual for specific model recommendations and troubleshooting guides. Proper maintenance and adjustments will extend the lifespan and efficiency of your motion sensor switch.
Leviton Customer Support and Resources
Leviton offers comprehensive support through their official website, including detailed manuals, installation guides, and troubleshooting tips. For assistance, contact Leviton’s technical support team via phone or email. Additional resources include FAQs, product specifications, and warranty information. Visit https://www.leviton.com for the latest updates and support documents. Ensure to have your product’s part number handy for quicker assistance, such as ODS10-ID or DOS05, to access specific guidance and solutions.